

Small Batch Fiber Dyeing
Hi everyone, I'm back to share what I did the other morning here
on the farm. I spent the entire morning doing some small batch fiber
dyeing. We are having quite the event
here on the farm this weekend. I mentioned it in the previous post but it’s
worth mentioning again. Suzy Brown aka Wool Wench is coming to the farm to do a
workshop on blending fiber, art yarn spinning and plying. Suzy is from the Netherlands and is teaching
on the east coast a few workshops. We were to have some fibers dyed and ready
to go!
So this morning I got out my Goodwill purchased crock pots and did some small batch dyeing to add to a color scheme that is in my mind. How I do my small batch dyeing is what I thought I would share with you today.
So this morning I got out my Goodwill purchased crock pots and did some small batch dyeing to add to a color scheme that is in my mind. How I do my small batch dyeing is what I thought I would share with you today.
Tools needed
1. Crock pots that will be used for dyeing only. I found all
of mine in Goodwill for only a few
dollars each.
2. I use Country
Classic dyes. They are a one-step dye power. They can purchased on line.
3. water
4. fiber
5. wooden spoon
Step 1. wet the fiber
in a sink with hot water for 20 minutes. This is to allow the dye to be
absorbed with ease.
Step 2 Fill your
crock pots with hot water and turn them on high
Step 3. Add your dye according the instructions on the
jar.
Step 4. Take out your fiber and add it to the crock pots,
making sure it is all covered. You can press it down ever so gently with a
wooden spoon. I say gently so the fiber won’t felt.
Step 5. Cover your pots.
In 15 minutes turn the temp to low and set the timer for 30 minutes. DO
NOT uncover.
Step 6. When your time is up take one pot at a time and dump
it into the sink. Be careful, it will be hot. Then fill the sink up with hot
water for a rinse. After about 10 minutes drain the sink and repeat until sink water is fairly clear. Try not to change
the temp of the water by much in-between the rinsing, again so as not to felt
the fiber. When the water is fairly clear or completely clear pick up the fiber
and gently give it a light squeeze to drain some of the water from the fiber.
Transfer it to a screen to dry. A screen will allow air flow from the top and
bottom drying the fiber quicker. If you
do not have one you can lay out on a towel in the sun.
Repeat step 6 with each crock pot of fiber.
I use this technique for all my small batch dyeing. I find
it really simple and always successful.
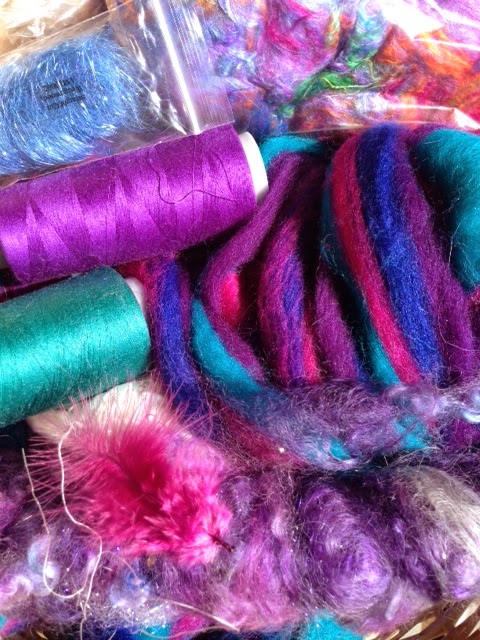
Today the fiber I dyed was pygora goat locks, a small
handful of Wensleydale sheep locks and
silk hankies that will be used in our new plying technique that we will be
learning. It should be an adventurous
day. I’ll blog all about it next week!
This fiber will be blended with an already dyed sheep wool that I had
and wanted to work around the color scheme.


I would also like to mention my new chickens! Lots of new chickens! Earlier in Spring we purchased from a local farmer some silkie chickens who are absolutely gorgeous! Gentle and friendly they have just started giving us eggs. Our quail from last year are still giving us eggs daily as well. Mike came home with 1/2 dozen one week old Leghorn chickens last week! He says these eggs are going to be bigger!! So the silkies are now mine and the leghorns are his! he is building another small coop for his chickens this weekend. And now I'm going to have to listen to "My eggs are bigger then your eggs!" Jeeeez! Oh well, as long as he is happy. He sure keeps me happy with all of my animal adventures!!


Silkie hen

our roo
Thank you for stopping in. Please be sure to sign on as a follower so as not to miss anything! lots more to come. I have an entire agenda for my blogging this year. Please feel free to comment of ask questions. Ill like to connect with you all
Spin On! xoxox
